Skip to content


Desk Cable Management: A Tested System for Clean, Serviceable Setups
Introduction
Most people organize cables backwards. They buy clips and trays first, then look for a place to put them. The result is a desk that photographs clean and breaks the first time a monitor needs to move. The better order is a plan first, hardware second: audit what you have, decide where each cable lives, then buy only what the plan requires.
I. Why is Effective Cable Management Important?
1. Creates a Clean and Professional Workspace
A cluttered desk filled with tangled cables can make even the most well-designed workspace look messy and unprofessional. Proper cable management—both on and under your desk—creates a sleek and minimalist setup, enhancing the overall aesthetics of your office. This is especially crucial if you frequently take video calls, host meetings, or create content where a tidy and organized background contributes to a polished and professional image.
2. Improves Efficiency and Workflow
Messy cables can disrupt your workflow by making it harder to locate and access the right connections. Without proper organization, cables can get tangled, fall behind desks, or become difficult to reach. A structured cable management system ensures that all your essential devices remain easily accessible, helping you maintain focus and work more efficiently.
3. Enhances Safety and Extends Cable Lifespan
Loose cables can become a tripping hazard or get caught under chair wheels, posing safety risks. Additionally, tangled and bent cables are more likely to wear out, leading to connection issues or electrical hazards. By properly routing and securing cables, you minimize these risks, ensuring a safer workspace and prolonging the life of your cables and devices.
II. Essential Tools and Products for Cable Management
To achieve a clean and efficient workspace, investing in the right cable management tools is key. Here are some of the most effective solutions:
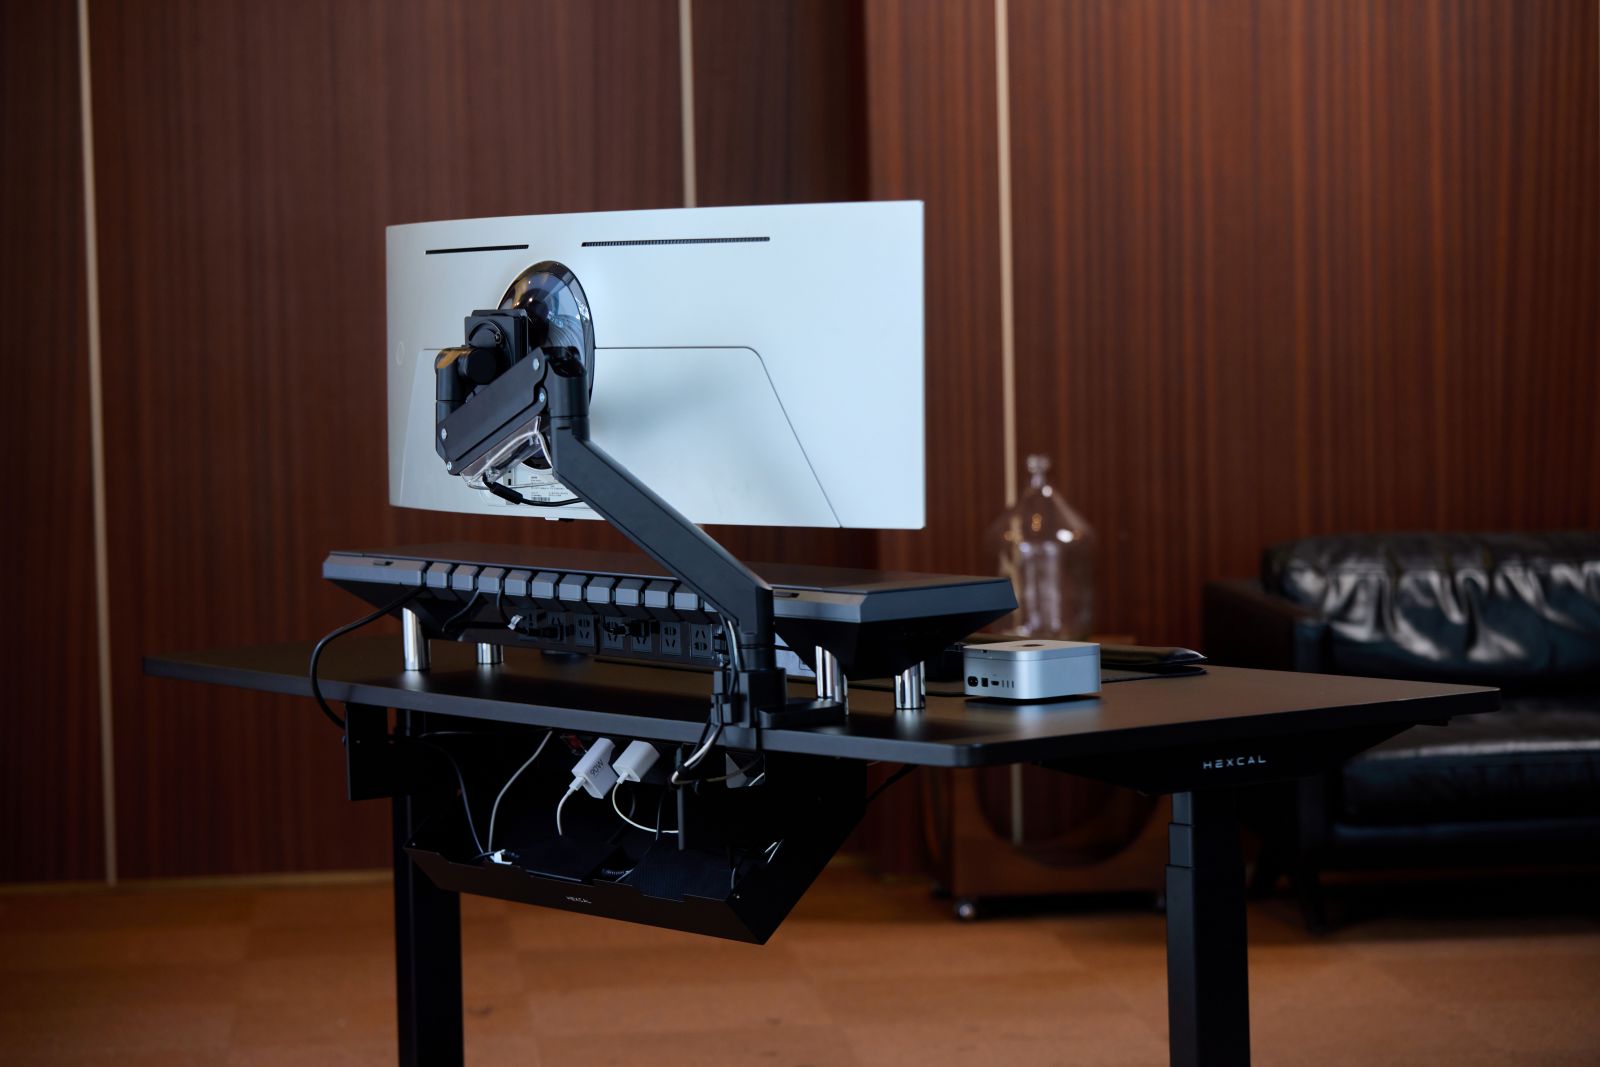
- Cable Management Trays: Mounted under the desk, these provide a designated space for power strips and excess cables, keeping them neatly tucked away and preventing clutter on the floor.
- Cable Clips and Holders: These secure individual cables along the edge of the desk or wall, preventing tangling while keeping frequently used connections easily accessible.
- Cable Sleeves and Ties: Ideal for bundling multiple cables together, cable sleeves create a uniform and professional look, while Velcro ties offer an adjustable and reusable option for easy modifications.
- Power Strips with Mounts: Instead of leaving power strips on the floor where they can get tangled or kicked, mounting them under the desk keeps them secure, accessible, and out of sight.
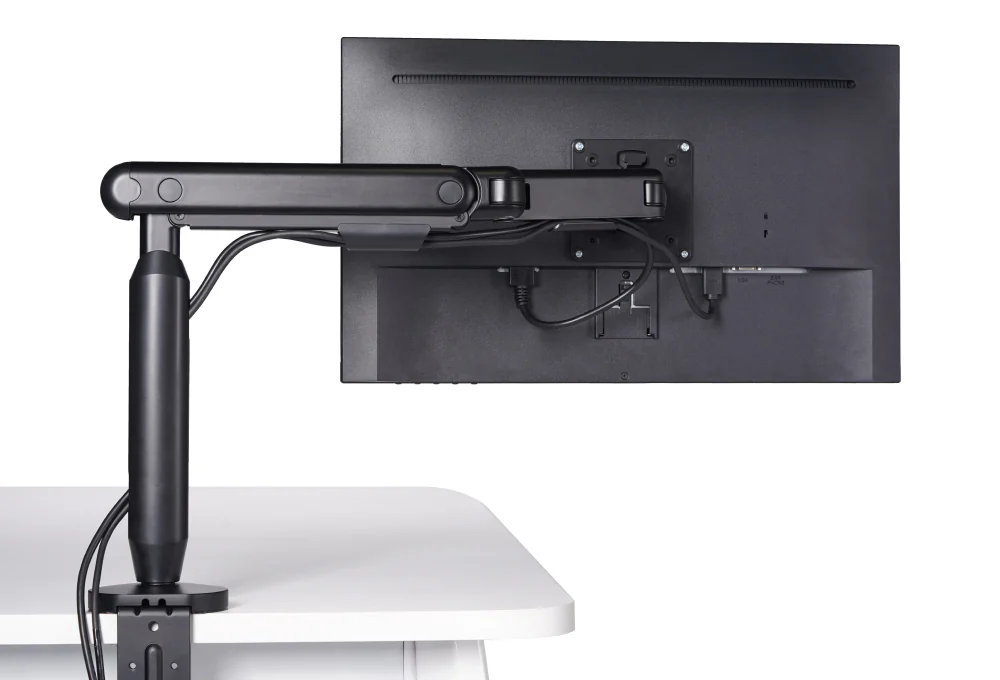
- Monitor Arms: These not only free up valuable desk space but also have built-in cable routing features that keep display cables neatly organized and prevent them from dangling.
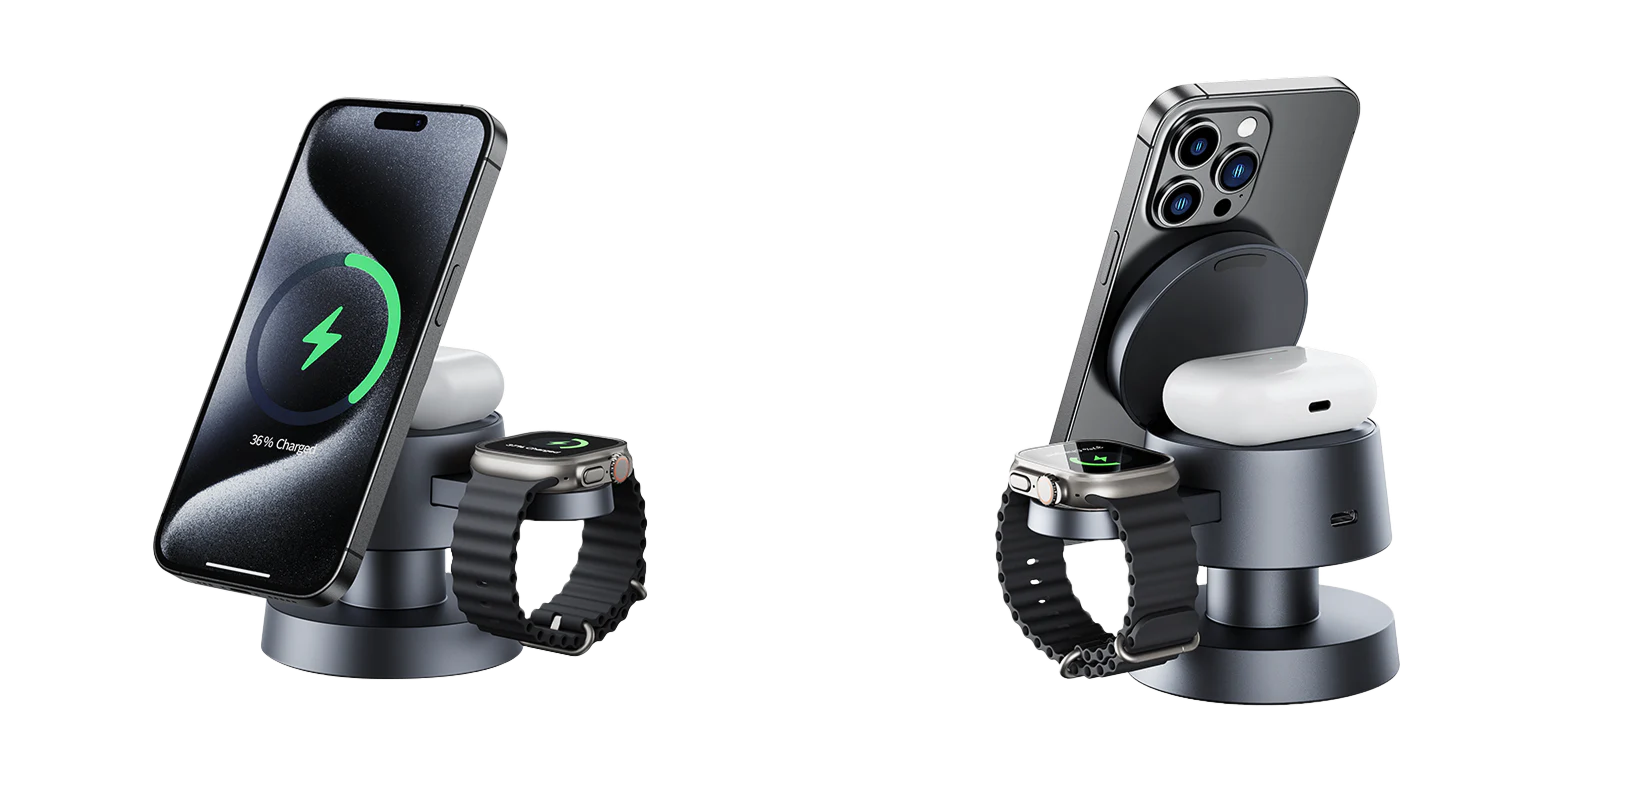
- Wireless Charging Stations: A modern and clutter-free solution for powering multiple devices, this station eliminates the need for separate charging cables, reducing overall desk clutter.
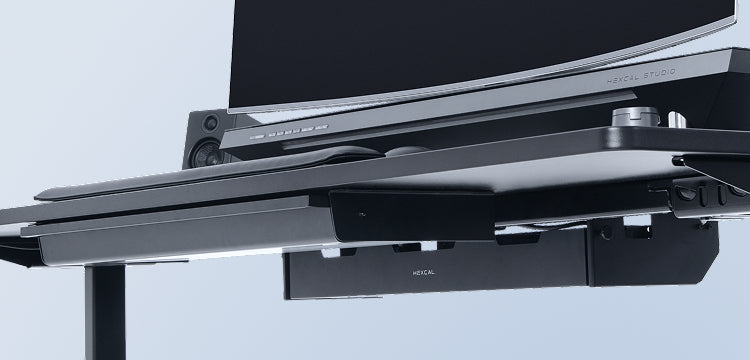
- Integrated Cable Management Workspaces: Designed for seamless organization, Hexcal Studio incorporates built-in cable management features, ensuring a clean and functional desktop setup without additional accessories.
III. Step-by-Step Guide to Organizing Cables
A clean desk setup hinges on meticulous cable organization. Follow these detailed steps to transform your under-desk chaos into a streamlined system that’s both functional and visually appealing.
1. Gather Your Materials
Before you start, ensure you have all necessary cable management tools, such as trays, clips, Velcro ties, and power strips. Having the right tools will make the organization process smoother and more effective. Additionally, consider investing in cable labels to make future maintenance easier.
2. Disconnect and Untangle Cables
Unplug all cables from your devices and sort them. Untangle any knots and inspect cables for damage. If you find frayed or damaged cables, replace them before proceeding. This step ensures you only keep functional and necessary cables in your setup.
3. Use Cable Trays and Clips
Secure cables under your desk with cable trays and clips to prevent them from hanging loosely. Consider adhesive clips for easy installation and repositioning. Place power strips in an accessible location, ensuring that plugs are easily reachable but neatly tucked away.
4. Label Your Cables
Use cable labels or colored zip ties to distinguish between different cables, making future adjustments more manageable. This is especially useful if you have multiple similar-looking cables for monitors, charging devices, or peripherals.
5. Bundle and Route Cables
Use cable sleeves or zip ties to group cables running in the same direction. Routing them along the desk edges or underneath surfaces keeps them tidy and hidden. Avoid over-tightening ties, as this can damage cables over time.
6. Mount Power Strips
Instead of letting power strips lie on the floor, mount them under your desk using adhesive strips or brackets to reduce clutter and minimize tripping hazards. This also helps keep cords elevated and neatly routed.
7. Secure Loose Cables
For cables that still dangle, use additional clips or Velcro straps to secure them to desk legs or along designated paths. Keeping cables secure prevents them from shifting or tangling over time.
8. Test for Functionality
Before finalizing your setup, ensure all devices function correctly and cables are not stretched or placed under stress. Check that all power sources are working, and make adjustments as needed.Cable management is not a one-time task. Periodically check and adjust cables to keep everything neat and organized as you add or remove devices from your setup.
IV. Best Cable Management Solutions for Your Home Office
Under-Desk Cable Management - Keep Wires Out of Sight
- Hexcal Cable Management Kit – A comprehensive set with various organizers, clips, and sleeves to keep cables in check.

Cable Management Kit
Keep your workspace neat and clutter-free with the Hexcal Cable Management Kit—a complete solution designed for versatile cable organization in your home, office, or even for PC building projects. With 288 pieces in total, this kit offers everything you need to manage and organize your cables efficiently while enhancing the overall aesthetics of your desk.
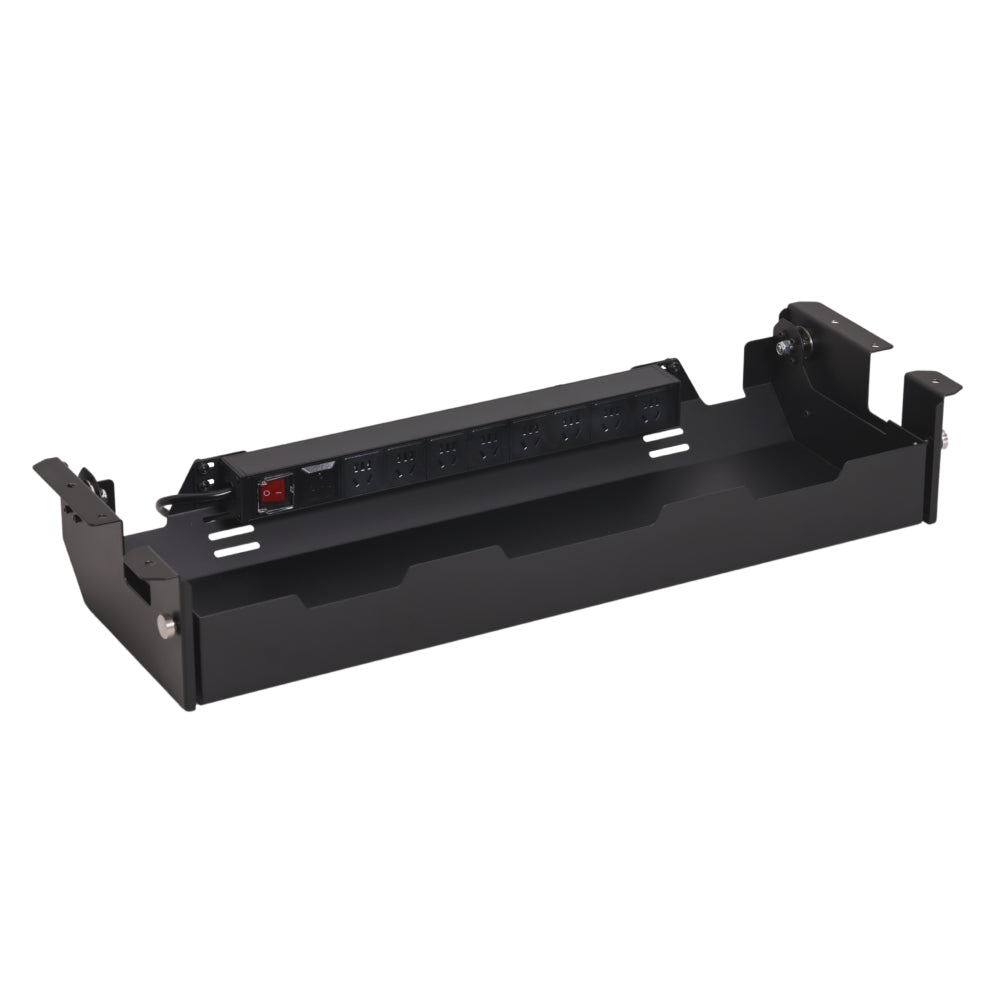
- Hexcal Under Desk Cable Management Tray – A durable, minimalist tray to keep power strips and cables neatly stored underneath your desk.
Under-Desk Cable Management Tray
The Hexcal Under Desk Cable Management Tray is designed to keep your workspace clutter-free while enhancing your desk setup. With a sleek, minimalist design, it not only organizes cables effectively but also adds to the overall aesthetic of your workspace. Its versatile design allows for flexible cable management from any angle, ensuring a clean and efficient setup.
Desktop Cable Management – A Cleaner, Wireless Setup
- Hexcal 4-in-1 Wireless Charging Station – Eliminates the need for multiple charging cables by consolidating wireless charging for multiple devices.
Monitor & Workspace Integration – A Professional, Minimalist Setup
- Hexcal Single Monitor Arm & Heavy Duty Monitor Arm – Helps route cables along the adjustable arm for a clean and professional setup.
Most people organize cables backwards. They buy clips and trays first, then look for a place to put them. The result is a desk that photographs clean and breaks the first time a monitor needs to move. The better order is a plan first, hardware second: audit what you have, decide where each cable lives, then buy only what the plan requires.
That's the whole method. This guide gives you the plan, the routing layers, the decision table for trays versus drawers versus sleeves, and a checklist to prove the system works before you close it up.
The simplest desk cable-management method: unplug everything, sort by device and destination, route power in one layer and data in another, then secure each run so it can be unplugged and serviced without undoing the rest. That's it. Everything else is hardware selection.
Phase 1: The 10-Minute Cable Audit
A cable audit is an inventory, not a cleaning session. Set a timer, pull every cable from behind the desk, and sort into four piles:
- In use, plugged into a device on the desk.
- Charging, temporary cables for phones, cameras, tools.
- Stored, spares, adapters, cables for devices you no longer own.
- Dead, frayed, cut, or non-functional.
Most clutter is pile three. "Just in case" cables outnumber working ones on almost every desk, and they're the ones that tangle everything else. Be ruthless with them. A spare HDMI belongs in a drawer, not under the desk.
While you're sorting, note two facts for each in-use cable: where it starts (device) and where it ends (wall, surge protector, monitor). That's your routing input.
Phase 2: Three Routing Layers
Treat the desk as three zones instead of one surface. Every cable gets a home in exactly one layer.
Layer 1, Desktop. Cables that must stay visible: the mouse, keyboard, and charging cables you reach for daily. Keep them short and perpendicular to the desk edge. Long desktop runs are the number one cause of visible clutter.
Layer 2, Under-desk. The workhorse. Power strips, excess cable loops, and every cable between the desktop and the wall live here. This layer needs physical hardware: a tray, clips, or a shelf with a cable chamber.
Layer 3, Desk-to-wall/floor. The vertical runs behind the legs. This is where power and data separate (see Phase 3), and where furniture movement causes the most damage.
If a cable doesn't belong in one of these layers, it probably belongs in pile three.
Phase 3: Separate Power and Data
Route power and data in different lanes. This is the difference between a setup that's merely tidy and one that's serviceable.
Power cables (and any adapter bricks) go along the back edge or in the cable chamber, where they can't be pinched by furniture. Data cables run separately so that moving one doesn't snag the other. When a monitor arm swivels or a standing desk lifts, a mixed power/data bundle becomes a snag point.
Adapters deserve special attention. A wall wart in the middle of a cable run turns the whole bundle into a rigid, unmanageable knot. Mount bricks to the underside of the desk or inside a tray, not floating mid-run.
Phase 4: Choose the Hardware by Constraint
There is no universal "best" cable organizer, and buying one on that basis is how the pile-three problem starts. Choose by your actual constraints:
| Your situation | Choose | Why |
|---|---|---|
| Standard desk, few cables | Under-desk tray | One home for the strip and loops; the classic fix |
| Many devices, docks, chargers | Drawer or tray with a locking cover | Keeps the chamber closed; you only see what's in use |
| Standing desk | Clips plus a moving-surface power mount | Fixed runs break at the height transition; see the standing desk section |
| Power-hungry setup (large monitor + laptop + peripherals) | Powered shelf with built-in outlets and USB-C | Power and routing integrated in one product |
| Minimal, frequently rearranged desk | Sleeves and Velcro only | Cheapest, fastest to change, no mounting |
Two rules apply to every option: the strip or PDU must stay reachable (you will reset a breaker mid-meeting), and nothing should be stretched taut. A taut cable is a broken cable waiting for a swivel.
Fixed Desk vs Standing Desk: The Branch Point
If your desk never moves, you're done after Phase 3. If it raises and lowers, one more decision matters.
Cables attached to a wall-mounted strip or floor outlet change length as the desktop travels. The standard fix is a slack loop near the moving surface, sized for the full height range, and a strain-relief point where the loop begins. Test it at maximum height, not seated height: run the desk up and down slowly twice and watch for taut runs, snag points, and cables catching the frame. This step matters more than the hardware you chose. See our standing-desk cable guide for the height-range checklist, and the ultrawide setup guide if a 49-inch panel is part of the plan.
A Powered-Shelf Example: The Studio
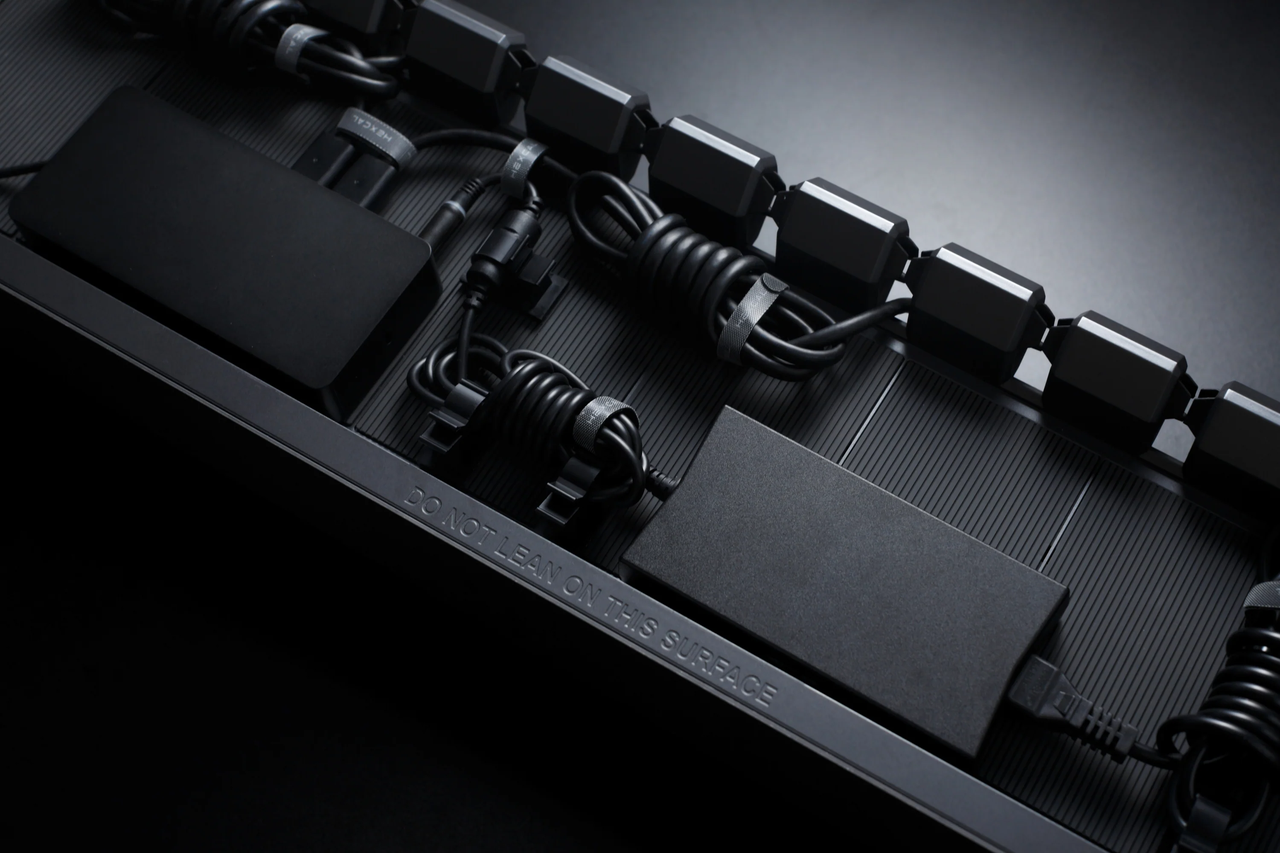
For a power-hungry setup, a powered shelf removes the worst part of Phase 3: finding a home for the strip. As a concrete example, the Hexcal Studio distributes up to 1,440W through horizontal sockets for large adapters, vertical sockets for standard plugs, USB-A Quick Charge ports, and USB-C Power Delivery up to 27W. Its patented 3D cord organization system routes cables through an internal channel so the desktop layer stays clean, and the isolated power system keeps internal components separate from user devices. The surface carries up to 101 lbs, which covers a 32" monitor plus laptop.
The point of the example isn't the product. It's the pattern: pick one device that handles power, routing, and surface space together, and the three-layer plan collapses into a two-layer one.
Bill of Materials and Test Checklist
Minimum parts for a clean, serviceable setup:
- Velcro ties or sleeves (the only thing that should touch the cables themselves)
- One under-desk tray or drawer with enough volume for the strip plus loops
- Adhesive clips for the desktop layer (short runs only)
- A strip or PDU mounted under the desk, with a reachable reset
- Labels for the cables you disconnect regularly
Test before you close it up:
- Every device powers on from the mounted strip.
- Every cable reaches without tension at the extremes of chair and desk movement.
- The strip is reachable and the reset button is exposed.
- Pull the most-used cable (the phone charger, the monitor input) and confirm it comes out without disturbing the rest.
- Raise and lower a standing desk twice at full travel; no taut runs, no snags.
If a cable fails the pull test, route it again. That's what "serviceable" means: the system survives maintenance, not just inspection.
The Long View
Cable management is not a one-time event. Devices change, monitors get bigger, and every change tempts you to add a cable instead of editing one. A system you can service beats a surface that only looks clean in the photo. Spend once on infrastructure that holds the cables, skip the impulse gadgets, and you'll rebuild the desk in ten minutes instead of an afternoon.
Quick answer to the question everyone actually asks: the simplest method is unplug, sort, route power and data separately, mount the strip, and test with a pull. Start with the audit in Phase 1 and the rest follows.
- Hexcal Studio – A well-designed workspace solution that integrates cable management features seamlessly.
For those looking for a more seamless experience, investing in a premium desk with built-in cable management solutions can be a game-changer. Options like standing desks with integrated cable troughs or magnetic systems can further enhance workspace organization and functionality.
V. Common Mistakes to Avoid
Even with the best tools, mistakes in cable management can lead to inefficiency. Here are common errors and how to avoid them:
- Overstuffing Cable Trays: Avoid cramming too many cables into one space, as it can lead to overheating and accessibility issues.
- Skipping Labels: Unlabeled cables can make troubleshooting and adjustments frustrating in the future.
- Ignoring Power Safety: Do not overload power strips, and ensure proper ventilation around power sources.
- Leaving Cables Loose: Loose cables increase the risk of tripping and tangling, so always secure them properly.
- Using Excessively Tight Cable Ties: Over-tightening cable ties can damage the wires over time. Opt for reusable Velcro ties instead.
Conclusion
A well-organized workspace starts with proper under-desk cable management. The key is to create a setup that enhances both efficiency and aesthetics. By implementing these strategies, you can maintain a clean desk setup, boost productivity, and keep your workspace safe and clutter-free. For high-quality cable management solutions designed for modern workspaces, explore Hexcal’s range of innovative products at Hexcal.com and take your workspace organization to the next level.
FAQ
A tidy cable system helps create a clean, professional-looking workspace, improves workflow, and enhances safety by preventing tripping hazards and cable wear.
The Hexcal Studio integrates built-in cable routing channels and a cord storage chamber, delivering a clean and functional desk setup without additional tools.
Begin by unplugging and untangling the cables and inspecting them for damage. Then, mount trays and clips strategically, bundle the cables neatly, and finally test everything for proper functionality.
Using items like under-desk cable management trays and secure routing ensures cables move smoothly with the desk, preventing tension or snagging, which are essential for standing desk ergonomics.
Common cable management mistakes to avoid include over-tightening cables, not leaving enough slack (which can cause tension or damage), and failing to plan the layout before mounting devices or outlets.