Saltar al contenido


How to Assemble Your Hexcal Standing Desk (Assembly guide)
Introduction
A standing desk can improve posture, reduce physical strain, and increase productivity by encouraging movement throughout the day. However, to get the most out of your investment, correct assembly is essential for safety, stability, and long-term performance.This beginner-friendly guide applies to the Hexcal Standing Desk as well as most adjustable desk setups. Using Hexcal’s model as an example, we will walk through each stage of the process in detail so you can assemble your desk with confidence.
Watch Before You Start
Before beginning assembly, take a few minutes to watch the full assembly walkthrough video. It provides a detailed, step-by-step visual guide showing how each part of the desk fits together and in what sequence. Watching the process in advance will help you understand the overall build, prepare the necessary tools, and avoid common mistakes during installation.
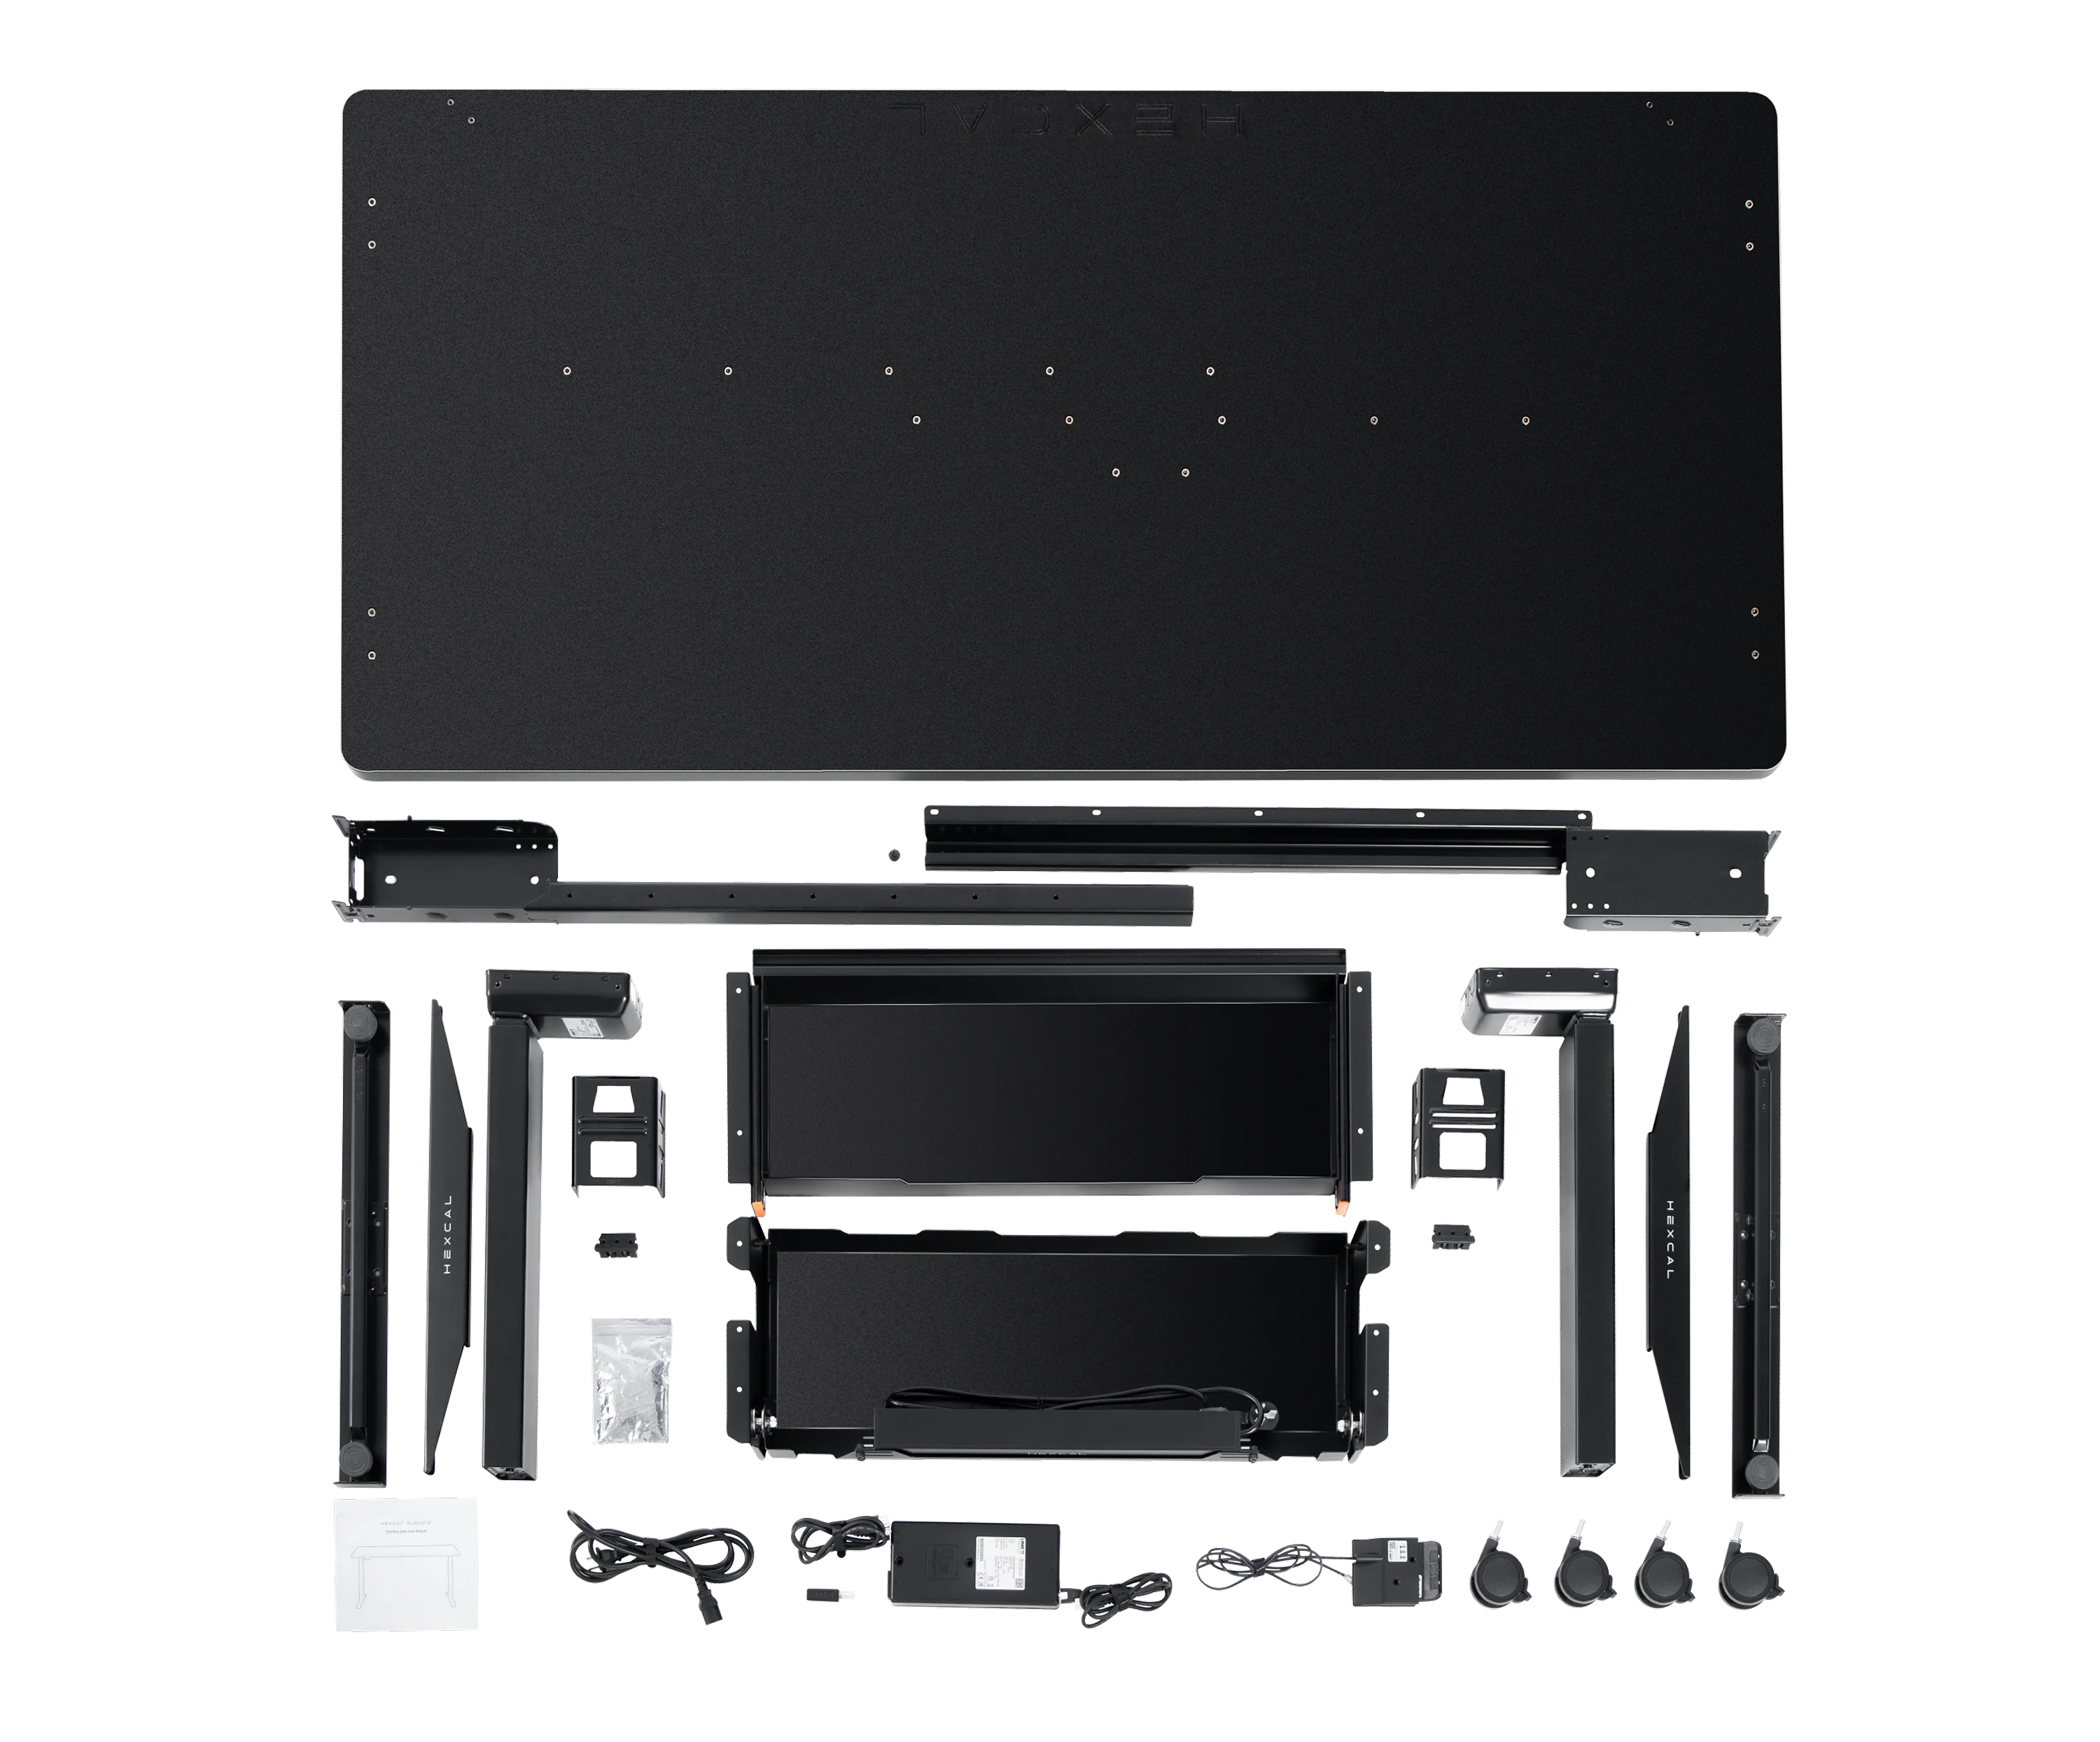
Section 1: Unboxing Your Standing Desk
Typical Components Included:
- Desktop with pre-drilled pilot holes
- Desk frame parts (outer and inner rails)
- Lifting columns
- Desk controller and control box
- Power and motor cables
- Screws and basic tools (Allen wrench/hex key)
- Optional accessories such as cable trays, drawers, or casters
Hexcal Standing Desk Specific Features:
- Linak® DL6 Plus dual-motor lifting system for smooth and quiet adjustments
- Anti-collision™ desk sensor for safety
- Kick&Click™ frame system for efficient assembly
- Four programmable height memory settings with LED display
- Free set of casters for mobility
Unpacking Tips:
- Use a flat, soft surface to protect the desktop.
- Arrange all components so they are visible and accessible.
- Confirm that all parts match the items listed in your desk’s manual before starting.
Section 2: Tools You’ll Need
Included with Most Standing Desks:
- Allen wrench (hex key)
- Screws and fasteners
Optional but Helpful:
- Electric screwdriver for faster assembly
- Protective gloves for handling heavier components
Safety Reminder: Desk components can be heavy. Always lift with care and consider asking for assistance when handling large pieces.
Section 3: Step-by-Step Assembly Guide
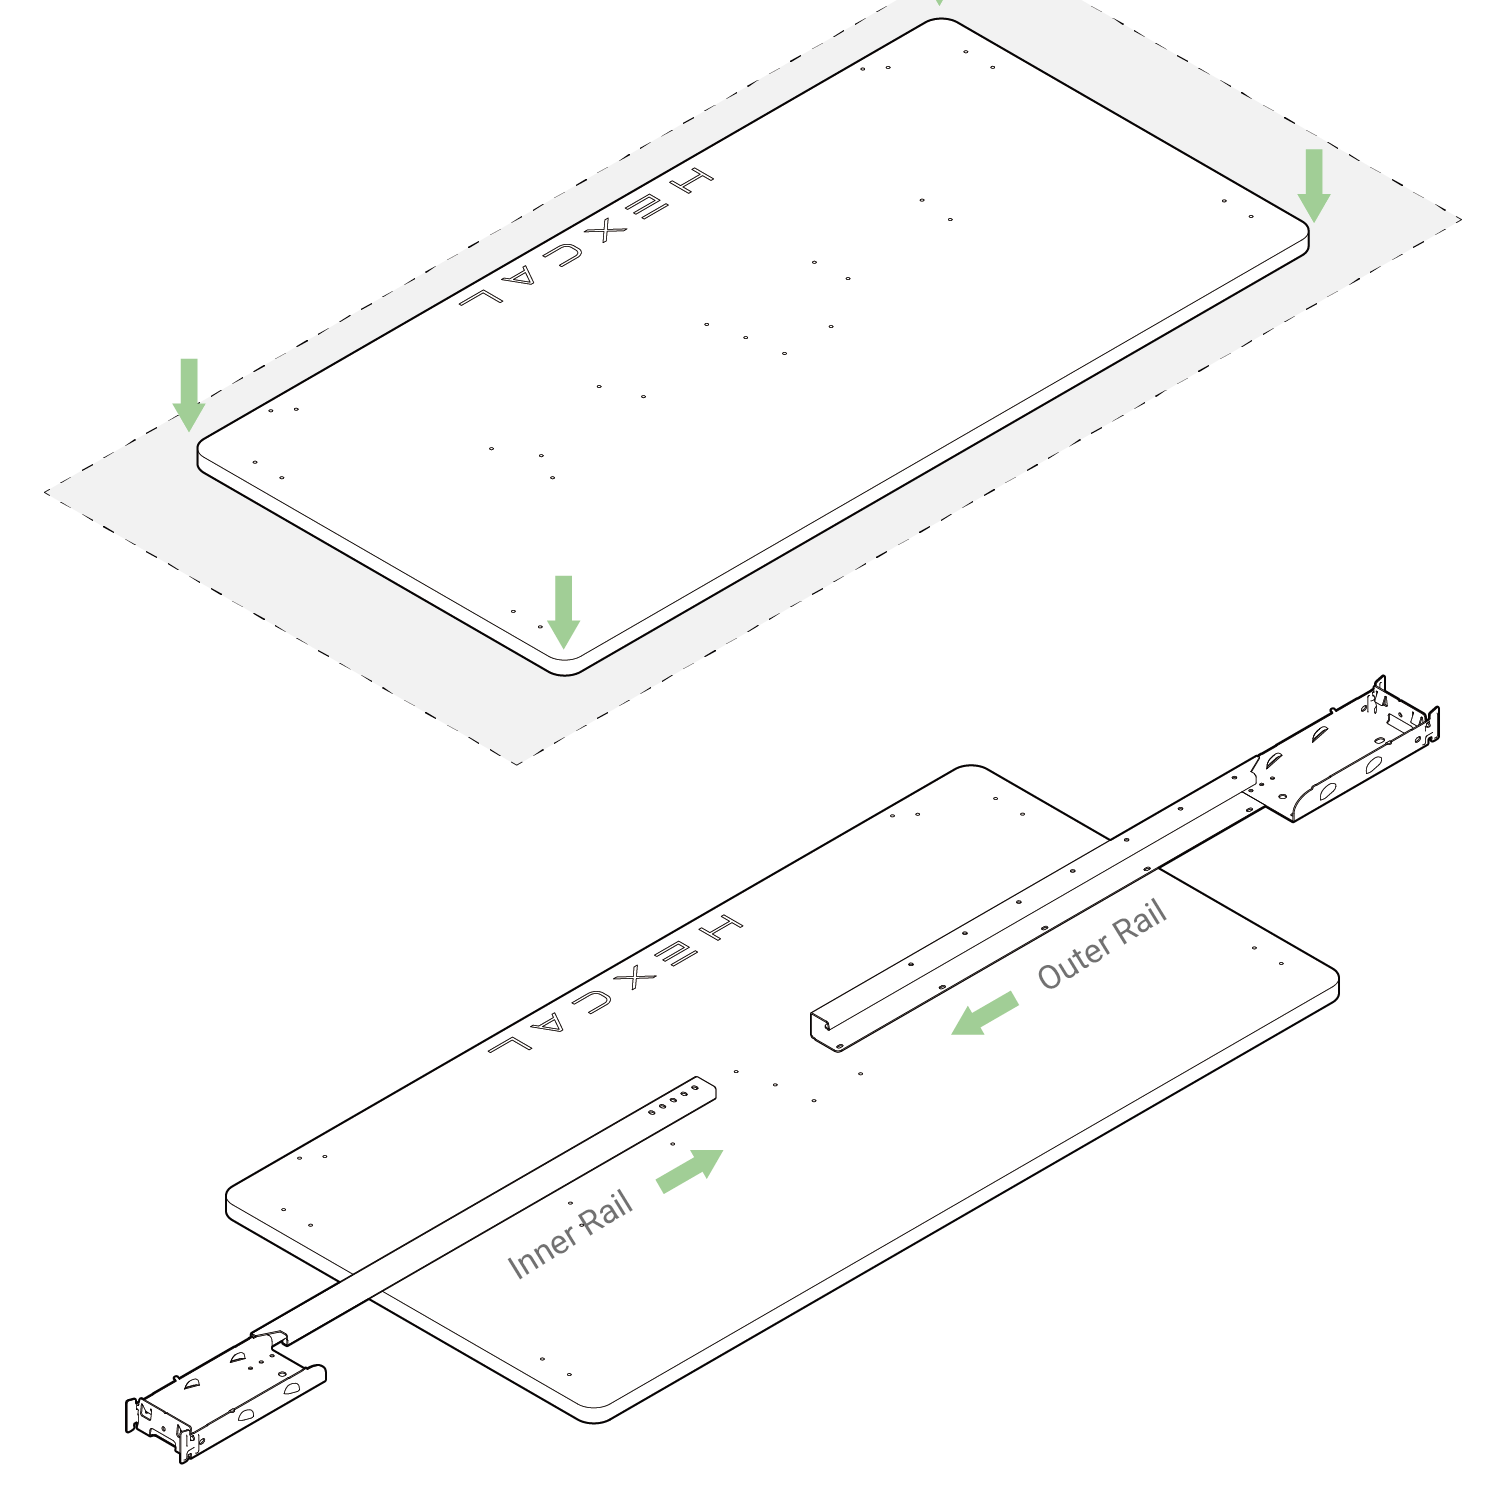
Step 1: Place the Desktop
- Position the desktop upside down with the pre-drilled pilot holes facing upward.
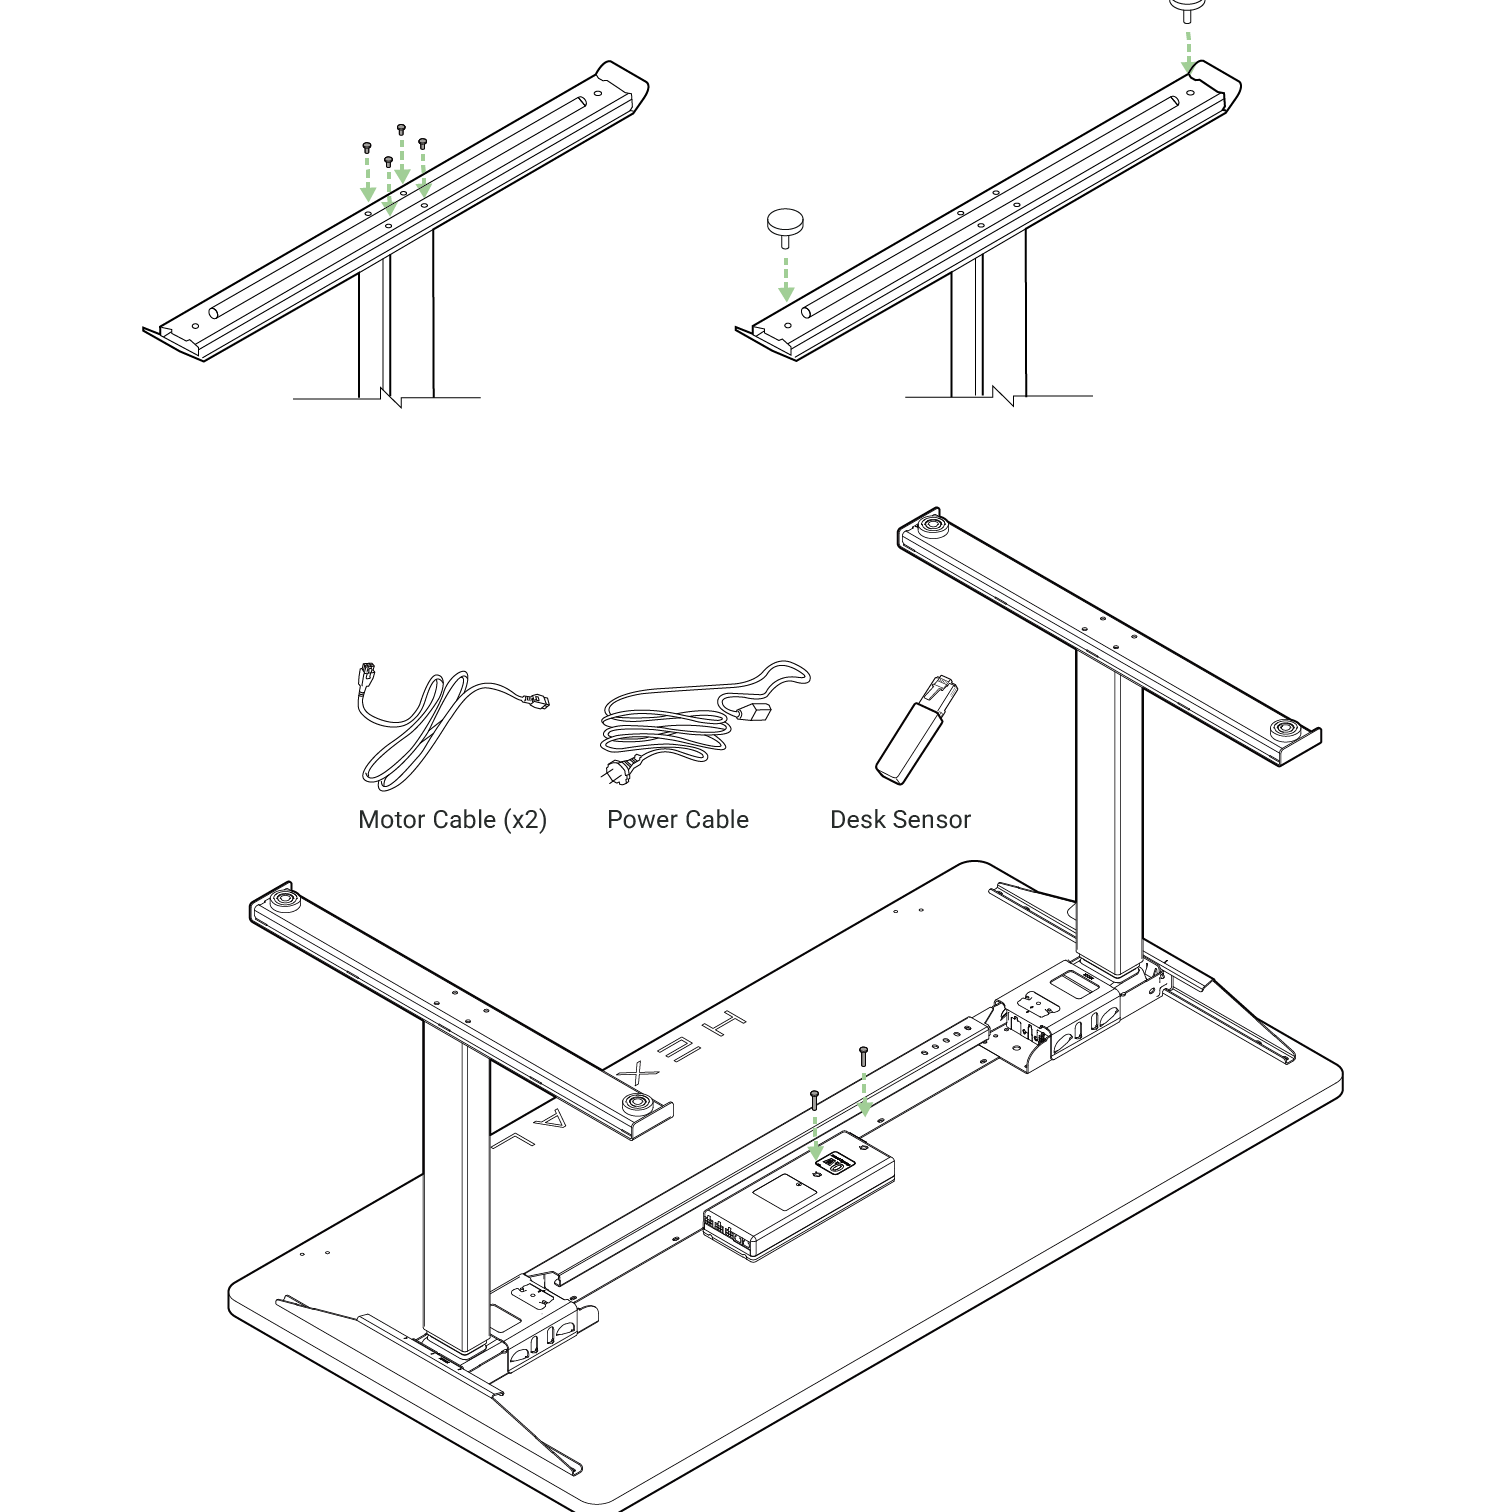
Step 2: Install the Rails
- Slide the inner rail into the outer rail.
- Align the slots with the pilot holes in the desktop.
- Insert the rail clip into the correct hole for your desktop size.
Step 3: Install the Cantilevers
- Slide each cantilever onto the outer rail tabs.
- Align the center marker with the rail’s center point.
- Leave these loosely in place for now.
Step 4: Secure the Frame to the Desktop
- Align all frame components with the pilot holes.
- Insert screws partially at first to allow for adjustments, then tighten fully.

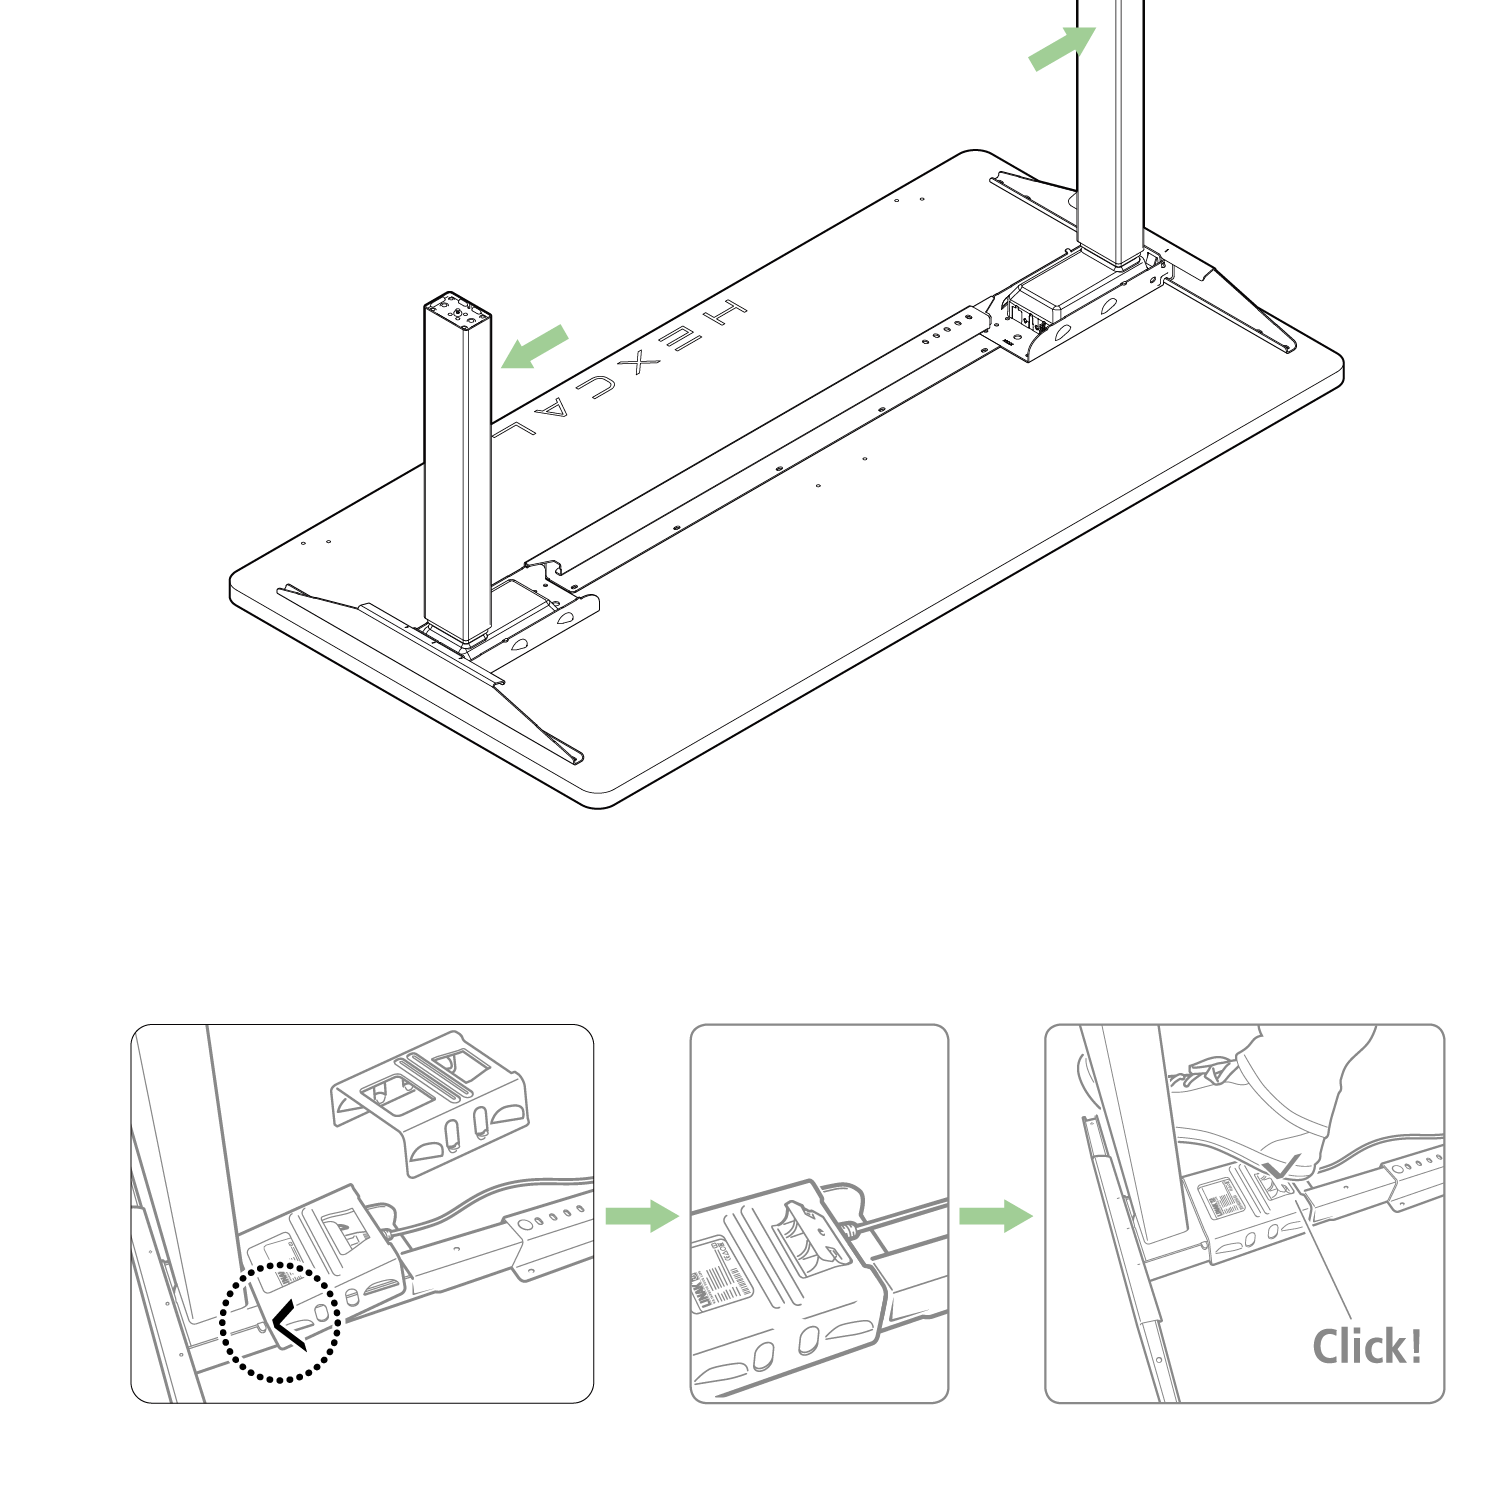
Step 5: Install the Lifting Columns
- Slide each lifting column into the end of the rail.
- Snap the clamp over the column.
- Insert the kick lock, aligning arrow to arrow, and press firmly with your heel until you hear a click. Wearing shoes is recommended for safety.
Step 6: Install the Desk Feet
- Attach each foot to the column using screws.
- Screw the adjustable levelers into the bottom of each foot.
Step 7: Install the Control Box and Electronics
- Position the control box in the center, using the pre-drilled holes for alignment.
- Connect the power cable, motor cables, and desk sensor (if included).
Step 8: Manage the Cables
- Tuck all cables neatly into the rails.
- Consider using a cable tray, such as the Hexcal Cable Management Tray, for a cleaner and more organized setup.
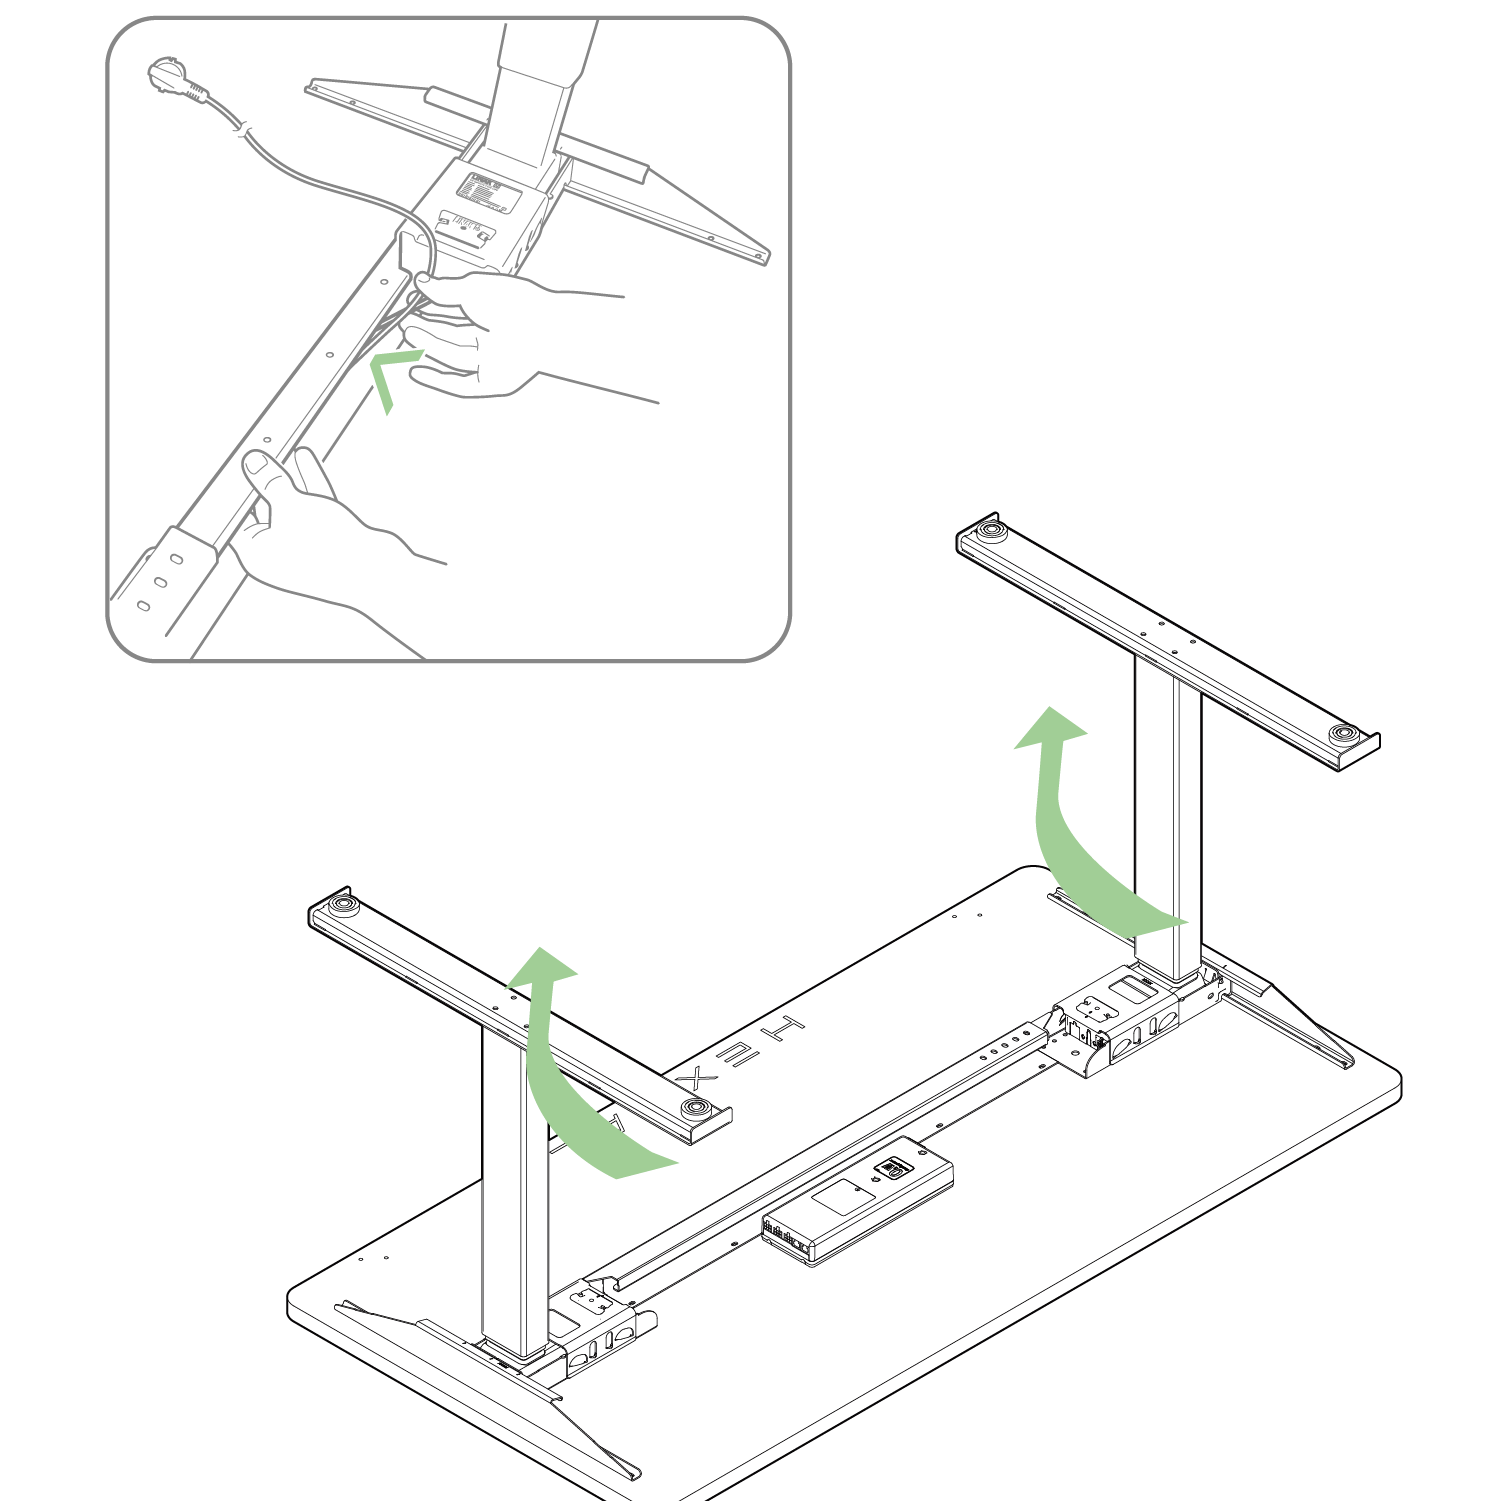
Step 9: Flip the Desk Upright
- Always use two people for this step to avoid injury or damage.
- Adjust the levelers to ensure stability:Unscrew to raiseScrew in to lower
Step 10: Install the Desk Controller
- Attach the desk controller to either the left or right side of the desktop.
- Connect it to the control box.

Section 4: Final Touches
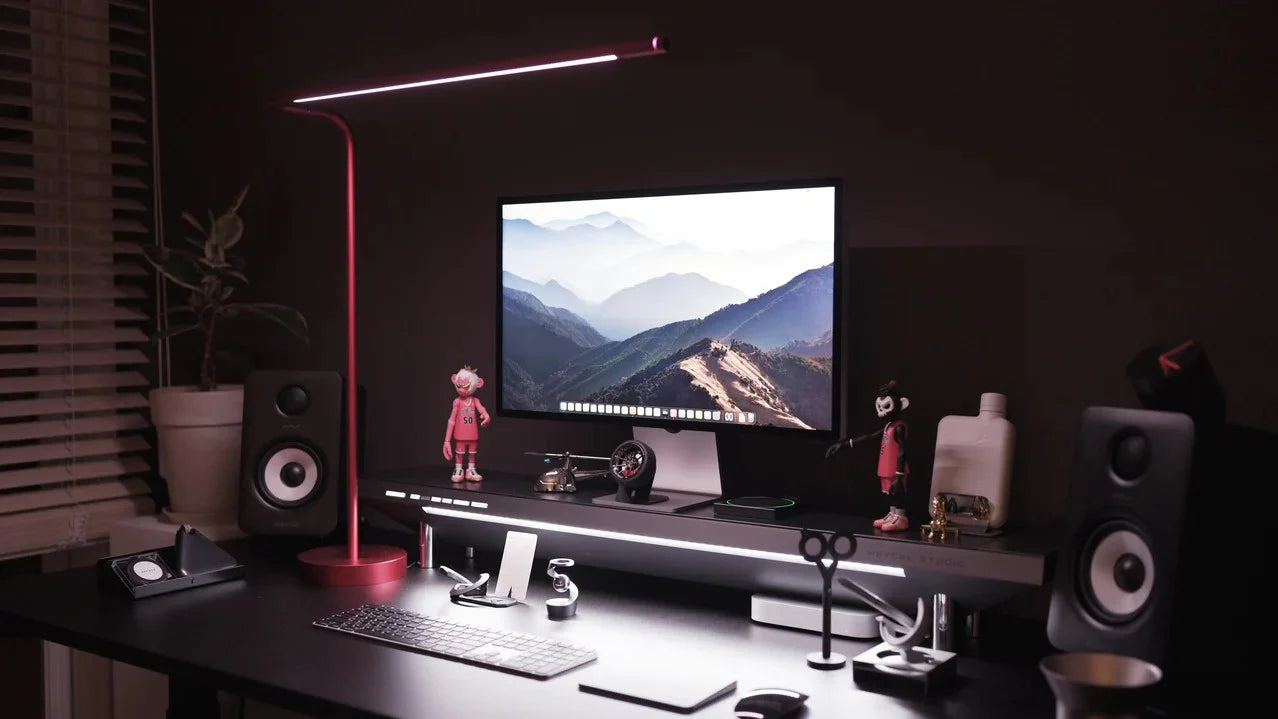
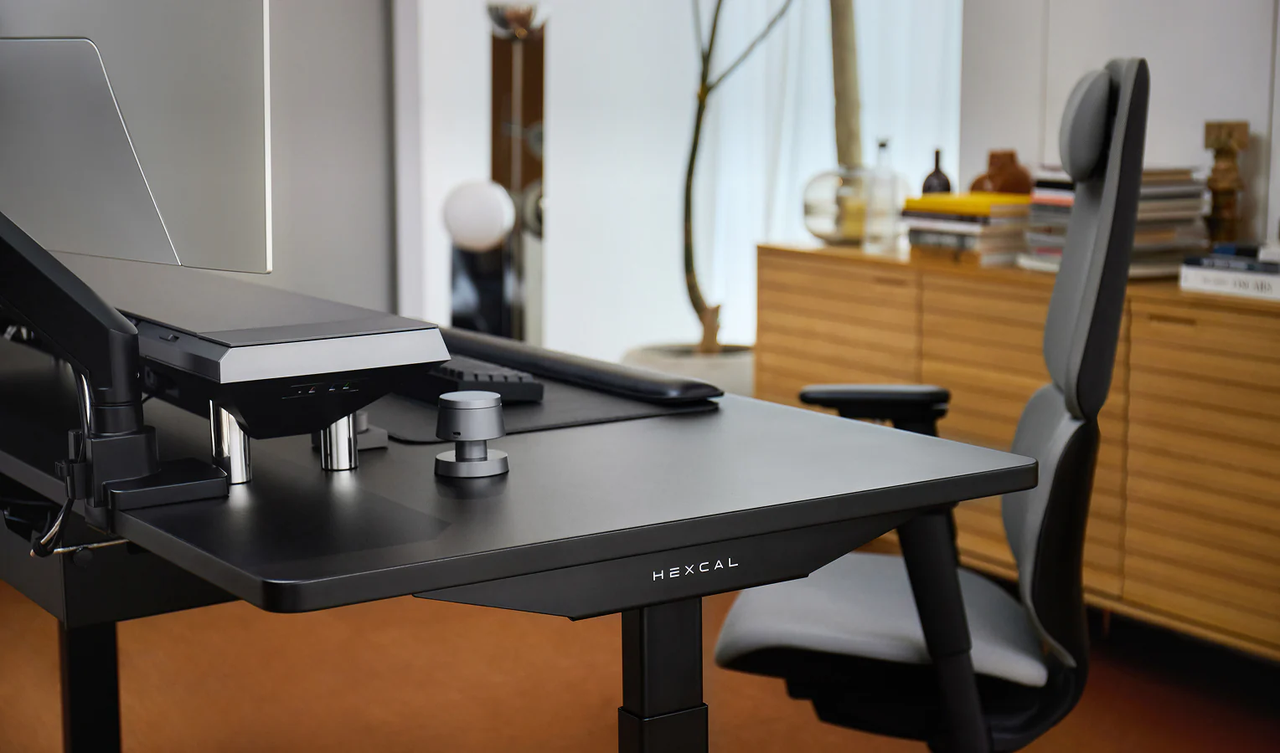
Once the desk is upright and level, take a moment to set it to your preferred starting height. If your desk includes programmable height presets, like the Hexcal Standing Desk, you can store your favorite sitting and standing positions for quick adjustments throughout the day. This is also the perfect time to personalize your workspace with ergonomic accessories. Monitor arms, under-desk drawers, and cable organizers can help create a cleaner, more efficient setup. If your desk is on casters, make sure they are locked once the desk is in its final position to prevent unintended movement. Taking these steps ensures your adjustable desk setup is not only functional but also comfortable and tailored to your workflow.

Section 5: Common Assembly Mistakes to Avoid
Even a beginner-friendly desk like the Hexcal Standing Desk can be tricky to assemble if you overlook a few key points. A common mistake is overtightening screws, which can damage pre-drilled holes or warp parts of the frame. Skipping steps in the manual, particularly safety features like the kick lock, can compromise stability and performance. Uneven weight distribution, such as placing heavy monitors or equipment off-center, may lead to wobbling or imbalance. Finally, neglecting cable management can result in tangled wires that interfere with smooth height adjustments. Paying close attention to each of these areas will help ensure your standing desk is safe, stable, and ready to support your daily workflow.
Download the Full Manual
Want a step-by-step visual guide? For detailed diagrams, part lists, and troubleshooting, download the Hexcal Standing Desk Manual (PDF).
Conclusion
With your standing desk fully assembled, you’re ready to enjoy a more ergonomic and flexible workspace. Proper assembly ensures stability, smooth operation, and safe use, allowing you to confidently switch between sitting and standing throughout the day. By setting your preferred height, organizing cables, and adding accessories that fit your workflow, you can create a comfortable and productive environment tailored to your needs. Taking the time to assemble your desk correctly sets the foundation for healthier work habits and a workspace that supports both focus and movement for years to come.